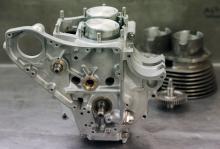
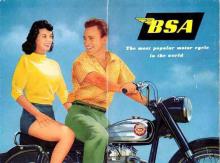
Classic Bike Magazine's Triumph T140 Flat tracker Engine Build (part 3)

Its time to get down to the serious issue, the building of the engine! If you’ve been Keeping tabs on Classic Bike Magazine's Rick Parkington's build of the Triumph Flat-tracker T140 Project you should be impressed by how much work he has done and at how stunning this bike is going to look...
As you should be aware by now, SRM Engineering built the motor for this Flat tracker and what you see now is the images of the engine itself being built.
The cases are clean and the crankshaft has been dynamically balanced, the journals measured and the whole assembly checked for fatigue. Its now time to start work on the engine itself.
We fitted the bearings,the driveside, gearbox and timing side to the cases and renewed the camshaft bushes as a matter of course. All the threads where cleaned and re tapped and new studs fitted. The camshafts that where supplied were serviceable, and needed only a slight polish before fitting. I must point out that the camshafts inner bushes were honed prior to fitting and that the outer bushes honed in place. Obviously several dry runs at mating up the crankcases with the camshafts fitted where required in order to determine that both camshafts spun nicely in their new bushes and that the cylinder faces were in alignment. The next step is the rods, original Triumph steel end cap rods, polished and balanced were fitted along with the Shells then they where bolted to the crank journals. A great deal of care and effort is required, keeping everything clinically clean in order for the rods to spin perfectly.
New big end bolts together with new nuts are torqued to 22flb, do not exceed this setting. If the rods do not fall slowly under their own weight, or if there is a slight “tight” spot, then the rods need to be removed and the problem rectified. A tight spot at this stage could lead to the shells deteriorating and in the worst-case scenario – a big end seizure! A definite no no.
OK, with everything in place and the bearings suitably oiled and the bushes lubricated the time has come to mate the two halves of the crankcase together. Oh, I nearly forgot, this is the time to fit the gearbox sleeve gear together with the sprocket. It’s far easier to fit
the sprocket at this stage rather than wait till later, but it’s not essential just a personal trait I have.
With the camshafts located in their bushes in the drive side of the crankcase and the crankshaft located in the timing side crankcase, a little sealing compound is smeared to one-half. Gently offer up the both halves taking care that the camshafts and the drive side bearing are locating in their relative places. Gently press both halves together and use a few nuts to secure. Do not tighten these nuts up fully as you have to ensure that the crankshaft is spinning freely together with the both camshafts, only when your satisfied that everything is as it should be and everything spins freely, do you tighten up the nuts and fit any bolts. Make sure that the cylinder base surface is
absolutely flat because obviously this is where the cylinders themselves
are going to rest and any irregularity with this face could result in blowing out a cylinder base gasket.
Right, the next stage…
The Primary,Timing side and its drive gears.
